Sunday, September 12, 2010

Cake Mix Cookies

In 8th grade I took Home Economics. Once a week we would make something to eat, then share with all the teachers in the school. I remember making haystacks and cookies made with a cake mix. Those became my favorite cookies and I made them all the time. I lost that recipe long ago, but Nana has a recipe for Cake Mix Cookies that I will share with you today.

The great thing about Cake Mix Cookies is that you can be creative and design your cookies to fit your own style. First, pick what flavor cookie you want by choosing your cake mix flavor. Then decide what you want to add to your cookies. Chocolate chips, raisins, nuts, and candies will do the trick. You could even ice the top with a
glaze or butter cream. It's lots of fun and easy enough to do with kids. Sophie (who is 2 1/2) has been helping make these cookies.


Devil's Food Mix with Chocolate Chips


French Vanilla Mix with Chocolate Chips


Lemon Mix (would have been great with a glaze!)

Cake Mix Cookies

Ingredients:
1 box cake mix (any flavor)
2 eggs
1/2 cup vegetable oil
1/2 cup of your add-in (chocolate chips, etc.)


Directions:
Preheat oven to 350 degrees. Mix all ingredients together, (you may have to use your hands). Drop teaspoons of dough onto an ungreased cookie sheet, about 2 inches apart. Bake 8-10 minutes. Allow to cool 2 minutes, then transfer to cooling rack or plate to continue cooling until set.

This makes a whole lot of cookies, or less if you want bigger cookies. Nana makes these to take to Vacation Bible School.

Monday, September 6, 2010

Nana's Baked Beans

Today is Labor Day! You're probably spending this day with family and friends. And eating, cause that's what you're supposed to do on holidays. Last night we had a meal at church. I've been wanting to make Nana's recipe for Baked Beans and last night was the perfect opportunity! It's a great dish to serve alongside your other holiday fare, or at your next church fellowship meal.


Nana's Baked Beans Deluxe

Ingredients:
1 lb. ground beef
4 15 oz. cans pork and beans (Van Camp's recommended)
1/2 cup brown sugar
2 tbsp. Worcestershire sauce
1 cup ketchup or tomato sauce
3 tbsp. mustard
1/2 green pepper, chopped
1 medium onion, chopped
3 tbsp. oil

Directions:
Preheat oven to 375 degrees. Heat oil in skillet on medium high heat. Add beef, pepper and onion to skillet and cook until beef is browned and vegetables are softened. Mix all ingredients in a large casserole dish. Cover and bake for one hour.

Tuesday, August 31, 2010

Brunch Potatoes

Here's another recipe from the Baby Shower...


Brunch Potatoes

Ingredients:
5 lbs bag tater tots
4-6 tbsp olive oil
4-5 tbsp all-purpose seasoning (see below)
Sprinkle of dried parsley flakes

Seasoning:
You can use any all-purpose seasoning that will go well with potatoes. I prefer
Emeril Lagasse's "Baby Bam"

Directions:
Completely thaw tater tots. Smash them to bits, (best done inside the bag, but can be done in the pan. Heat olive oil in a large skillet on medium-high heat. Add potatoes and sprinkle with seasoning. Depending on size of skillet, you may need to do this in batches. Stir well to incorporate the seasoning into the potatoes. Sprinkle with dried parsley for extra color. Serve warm.

Click here for a Printable Recipe at Tasty Kitchen.


Thanks to Leigh for the photo.

Saturday, August 14, 2010

It's a Boy!


Baby Liam is finally here!
Born 8/13 at 12:55 p.m., weighing in at 8 lbs. 13 oz. and measuring 21 inches.


Baby Liam with Daddy and Big Sister Sophie

Last week we had a baby shower and my mom made the punch. Several people wanted the recipe, so here it is.

DSCF4199 copy 


It's A Boy Punch
24 Servings

1 (0.13 ounce) package blue raspberry flavored unsweetened Kool-Aid
1 (2 liter) Sprite
1 (64 fluid ounce) bottle white cranberry juice or white grape juice
1 cup sugar, or to taste
8 scoops vanilla ice cream

In your punch bowl, add the Kool-Aid, Sprite and juice and stir to combine. Add the sugar a little at a time, stirring well and tasting after each addition until it is sweetened to your taste. Drop scoops of ice cream into the punch, allowing them to float on top like clouds. Once the ice cream begins to melt a little, it will turn the punch baby blue colored.

Variation:
For the picture shown, Sugar-Free Kool-Aid was used and it made it foamy. It still looks nice, but Mom says it's better as prepared according to this recipe.

*For the shower she also used the white grape juice.

Click here for the Printable Recipe at Tasty Kitchen.

Enjoy!

Tuesday, August 10, 2010

Salmon Bake for Brunch


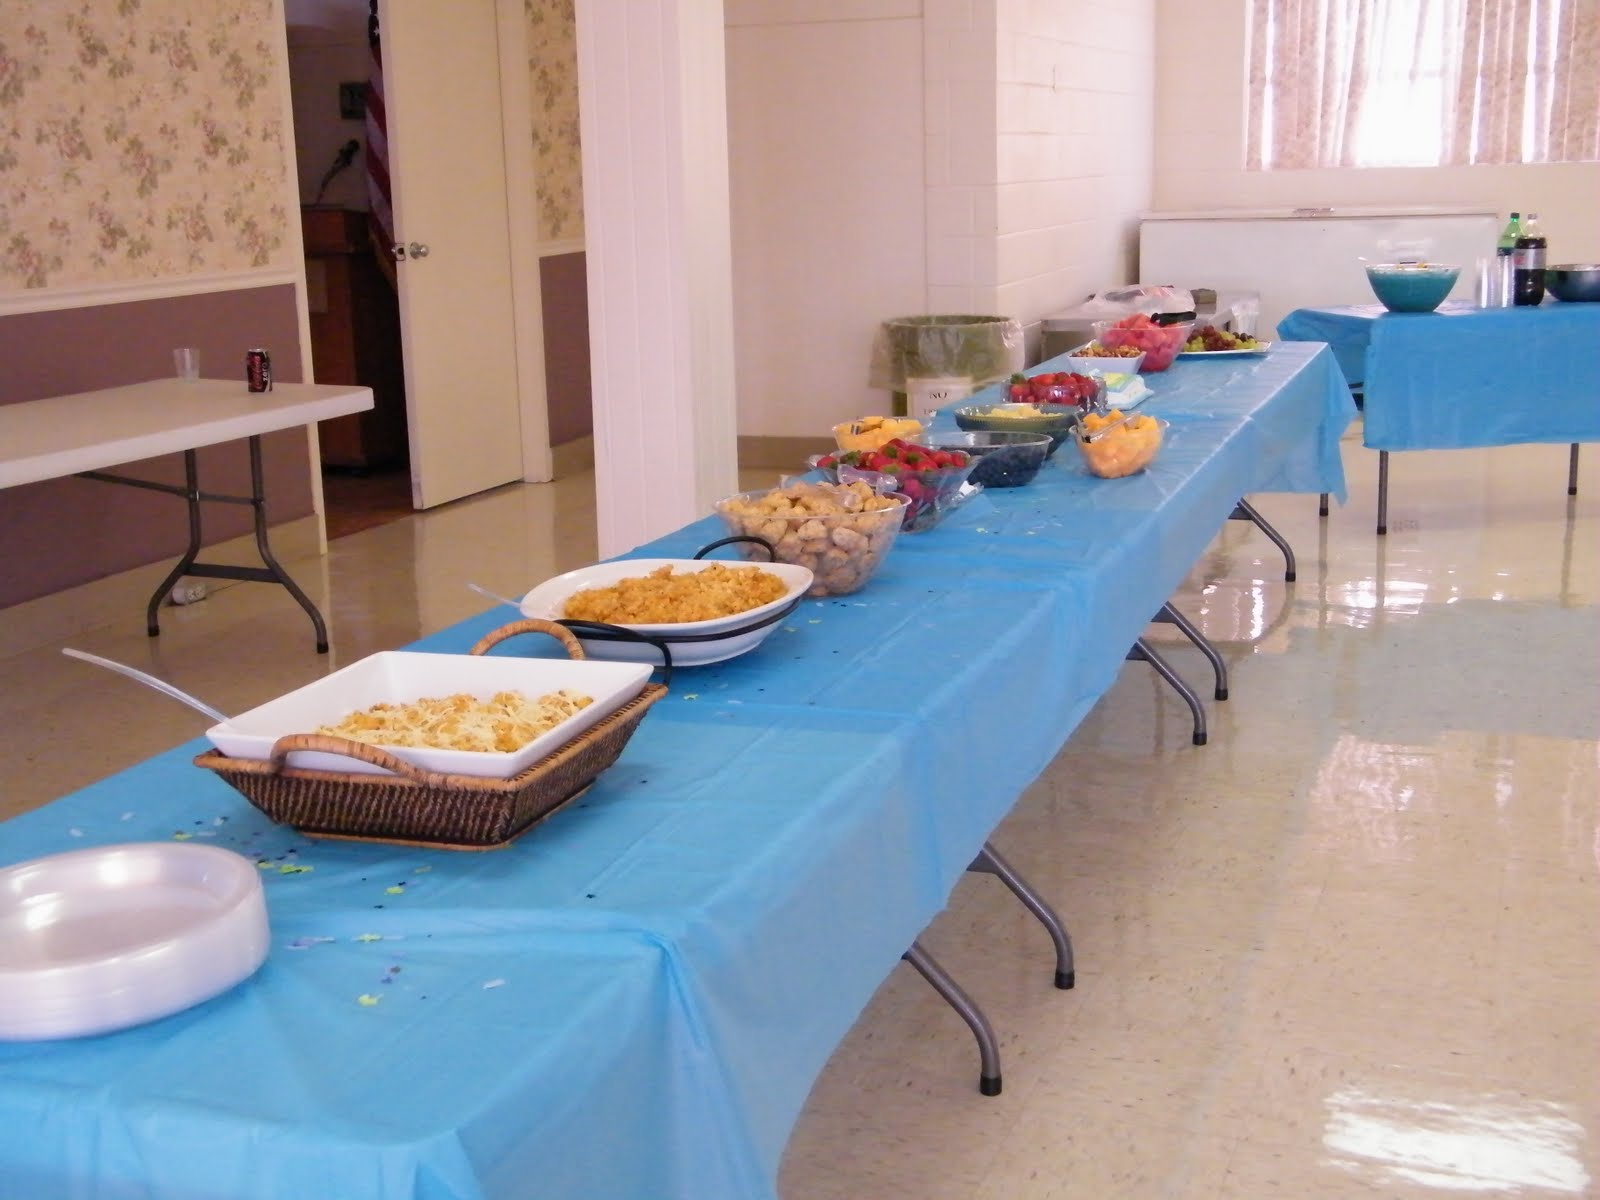
Saturday we had a Baby Shower for the soon-to-be-here Baby Liam. We had it at 11:00 a.m. so it was an appropriate time to have Brunch. Being brunch, it was treated as more of a meal than your normal baby shower fare of cake, mints and punch. We had quite a spread:


I really wanted to make something for the shower, mostly because it was something I was dreaming about eating. So I made my Salmon Bake. It is a really easy recipe, and if you've made my Salmon Patties, you already know much of what to do since it is a variation of that recipe. I doubled this recipe and it was exactly enough for this shower, because no one (well, except for me maybe) was eating a full serving. And boy, was it yummy! It was perfect and exactly what I had been craving!


Salmon Bake
Serves 6

12 oz. cooked salmon, flaked *see note below
1 6 oz box stuffing mix (cornbread flavored)
1/3 c mayonnaise
1 tbsp. lemon juice
2 cups shredded mozzarella (reserve some for top)
1 egg
3/4 c water
2 tsp oil

Mix together well the mayonnaise, lemon juice, egg, water and oil. Then mix all ingredients together in a large bowl and place into a baking dish. Sprinkle top with reserved mozzarella. Bake in a 325 degree oven for 10-15 minutes.

*I bought frozen salmon fillets and after defrosting, sprinkled with kosher salt and grilled on my George Foreman style grill. It is more economical than buying in cans or other packaging.

Click here for the Printable Recipe at Tasty Kitchen.

* Thanks for taking pictures, Leigh!

Thursday, July 29, 2010

Yummy Once--Yummy Twice--Yummy Chicken Soup with Rice

Have you missed me? I'd like to say I've been really busy with no time to write. In reality, I've just been too pregnant and lazy to be motivated to do anything much. Even though I should probably save every tiny amount of motivation I might find for baby prep, I felt that at least one post before Baby Liam gets here should be in order.

This recipe came about one afternoon when I was trying to figure out what we'd have for dinner. Too hot to spend much time in the kitchen, and too weary to do much standing, I decided it was a crock-pot kind of night. I threw some chicken into the pot and then searched the kitchen for something to give it flavor. I found a can of chicken and rice soup and decided that would do.

That evening, I fished out some of the chicken from the crock-pot and served with whatever sides I had prepared. It made our taste buds sing! There was some chicken left, (not to mention that beautiful golden liquid) all of which went straight to the fridge. The next day for lunch, I took the remaining chicken and mixed it with some rice and peas and the reserved soup. DELICIOUS!!

If you just want the chicken by itself, follow the first part of the recipe, but continue on for the chicken and rice recipe.

Click here for the Printable Recipe at Tasty Kitchen.


Yummy Chicken and Rice
serves 6

Ingredients:
1 1/2 lbs boneless, skinless chicken breasts
2 cans chicken and rice soup + 2 cans of water
1 tbsp olive oil
2 tbsps butter
salt and pepper to taste
*******************************************
6 cups cooked rice
1 can of green peas, drained


Directions:
Sprinkle chicken with salt and pepper. Add to crock-pot and drizzle with olive oil and add butter. Add soup and water. Cover crock-pot and turn to high and allow to cook until done, (according to crock-pot instructions).
********************************************
Place the chicken in a large bowl and shred. Add rice, peas and the remaining soup and mix well. Devour!!

I told you once
I told you twice
all seasons
of the year
are nice
for eating
chicken soup
with rice!

--Chicken Soup with Rice by Maurice Sendak

Tuesday, June 1, 2010

Nana's Famous Rolls

Either I'm very ambitious or just plain insane.

Sunday was a Family Reunion for my husband's family. Since a lot of people are from out of town, my mother-in-law orchestrates the meal and gets the locals to do the cooking. I have been doing the deviled eggs since joining the family, (more on that later). This year, I wanted to try a recipe of Nana's, one for which she is famous.

For just about any family function we have, Nana will make her yeast rolls. It just wouldn't be right if she didn't make them. So, of course, I had to try my hand at making them. I volunteered to make them for the reunion. Here's the thing: I'd never made rolls before, and I don't have the best track record with yeast. But for some reason, the challenge didn't register, even after calculating the need to make a double recipe. No biggie, right?

I have to say the rolls turned out pretty well, especially for my first time making them. I did learn two important lessons: my oven browns them too quickly and if I want the rolls to taste just like Nana's, margarine cannot be substituted. I feel confident that, with some practice, I will be able to make these rolls just like Nana herself.


Nana's Refrigerator Rolls
Yields 3-6 dozen depending on cutter size

1 cup shortening
3/4 cup sugar

1/2 teaspoon salt
1 cup water (boiling)
2 eggs beaten
2 packages dry yeast
1 cup water (lukewarm)
6 cups plain flour (unsifted)
1 stick melted margarine

Place shortening, sugar and salt in a large bowl, pour in boiling water and stir until shortening is softened. Allow to cool.

Add eggs to mixture. In a small bowl, sprinkle yeast into lukewarm water and stir, then add to mixture. Stir in flour and mix to fully blend all ingredients. Cover with foil and place in refrigerator for at least 4 hours or overnight. Make sure there is room for dough expansion in the bowl.

Just over 3 hours before baking, roll out dough to about 1/2 inch on a floured surface. Cut with a biscuit cutter and place on baking sheets. Brush with melted margarine and fold over in half. Cover with a tea towel and allow to rise for 3-4 hours, (a warm environment is best).

Bake at 450 degrees for 12-15 minutes or until browned to your liking. Brush tops with remaining margarine. Leftovers can be stored in refrigerator and later heated in microwave or warmed in the oven.

To make ahead of time, bake until not quite browned then freeze or store in refrigerator, then thaw and brown in oven as above.

Note: I used a medium sized biscuit cutter and it made larger rolls by the time they had done all their rising. Having doubled the recipe for the reunion, I ended up with 85 rolls total.

Click here for the printable recipe at Tasty Kitchen.