Showing posts with label antique and vintage recipes. Show all posts

Tuesday, May 18, 2010

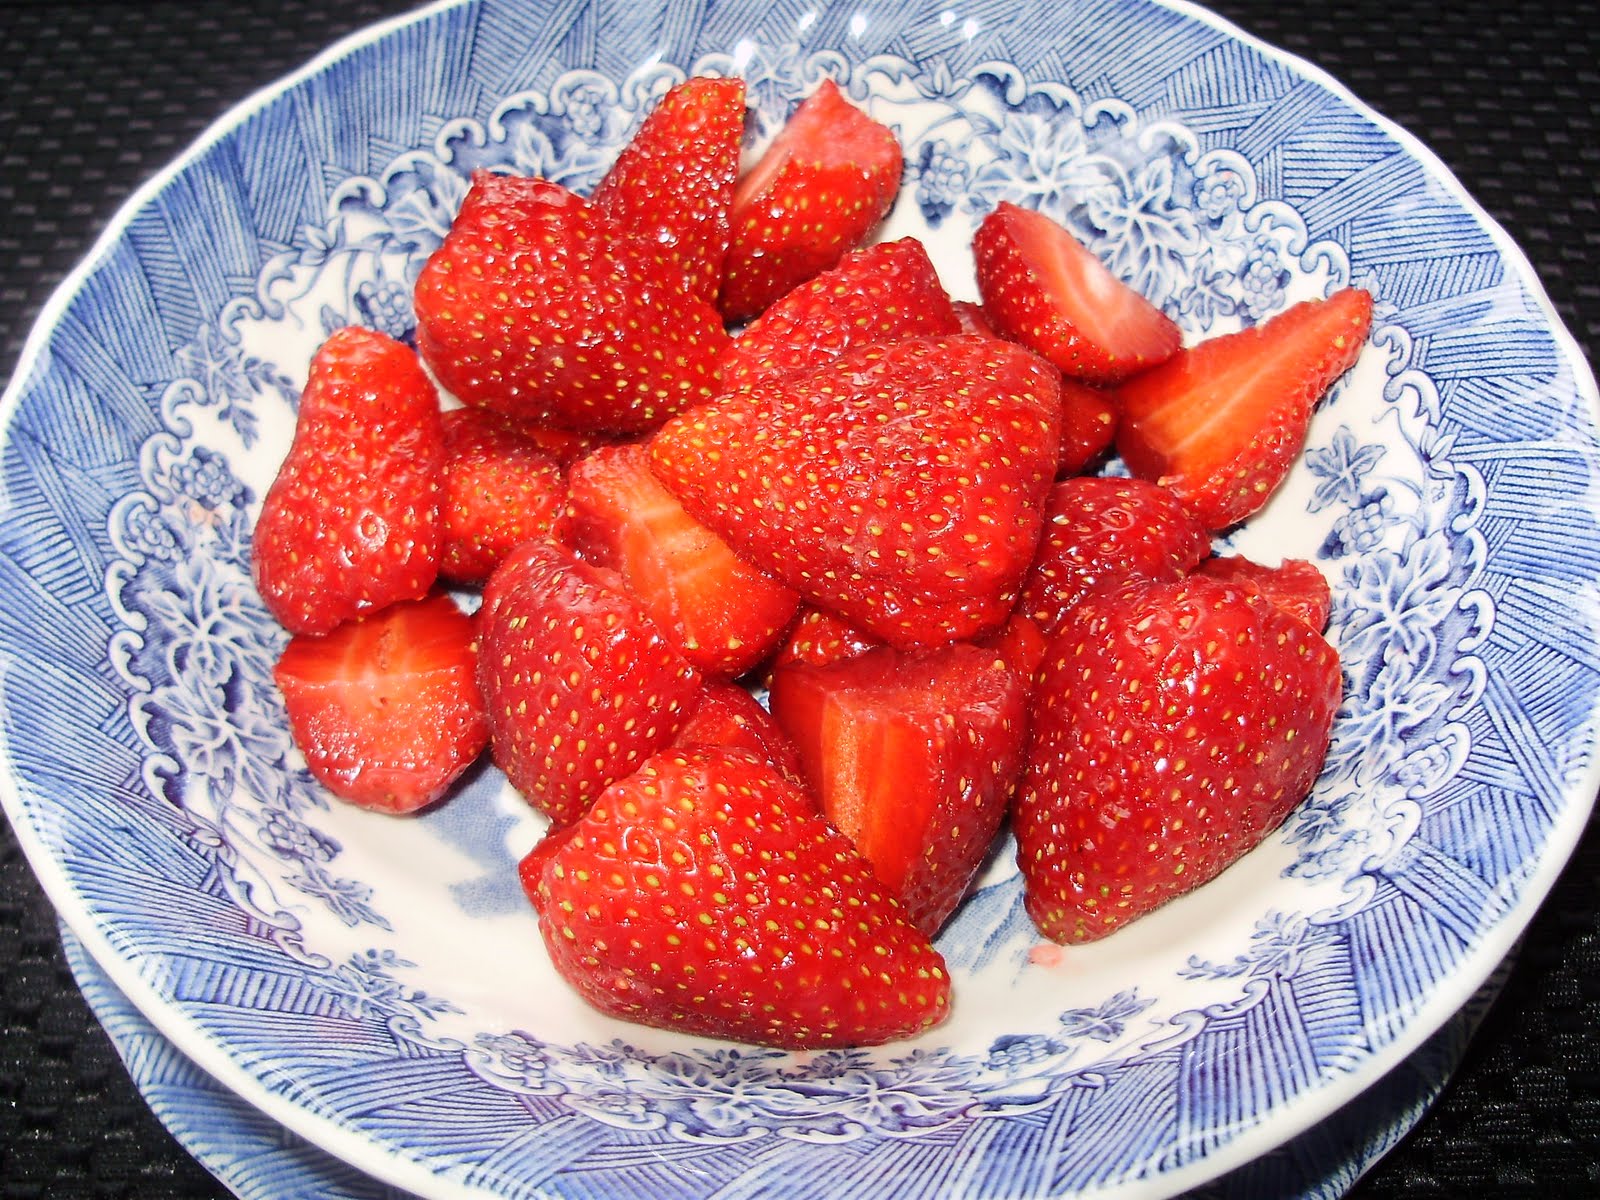
Strawberries and Cream

It's Day:2 of Strawberry Week and I'm going to show you my FAVORITE way to eat strawberries. The first time I ever had proper English Strawberries and Cream was in June of 2003 at the home of a lady named Brenda in Bristol, England. We had a delicious lunch: Baked Salmon, Steamed Vegetables with Parsley Sauce, Elderflower Presse (another first for me). But the thing I will remember most of that day was my discovery of Strawberries and Cream.

Strawberries and Cream is a fine example of English Cuisine. In fact, it is famous for being a main staple for the
Wimbledon Tennis Championships. Each year, Wimbledon attendees consume around 2 million strawberries and 2,000 gallons of cream.

Probably the most popular variety of strawberry in England is
El Santa. Please, somebody tell me where I can find these in the States! El Santa is smaller and sweeter than what most Americans will find in the local grocery store. For this reason, although in England the strawberry may remain whole for Strawberries and Cream, if you are using a large strawberry, it may be best to slice each berry in half.

Strawberries and Cream

Step 1. Wash and hull strawberries. Slice in half or add whole strawberries to bowl.


Step 2. Sprinkle with a little sugar, a little goes a long way, especially if the strawberries are already sweet.


Step 3. Pour cream over strawberries. In England, the cream of choice is Double Cream. Double Cream has at least 48% milk fat. If you are unable to find double cream, then heavy whipping cream, (with at least 36% milk fat), can be used instead.


With strawberries announcing the start of summer and Wimbledon just around the corner, (June 21-July 4, 2010) this is a great time to try probably the easiest dessert you could ever make.


See also this New York Times article about Strawberries and Cream at Wimbledon.

Wednesday, February 24, 2010

Iron Cupcake: Earth--Romance

For this month's Iron Cupcake: Earth the challenge is to create a cupcake with the theme of Romance. I immediately thought of one of the world's best-loved love stories: Elizabeth Bennet and Mr. Darcy.


Initially, I planned on researching what types of cakes would be eaten in Regency England, and then use them as inspiration for a cupcake. After a little internet browsing, I really wasn't inspired, so I turned to my Google bookshelf for some antique cookbooks. What I found was a recipe for Queen Cakes which I noticed were to be baked in tins. Other cakes called for only one tin, so this made me wonder if these could be considered cupcakes.

From The Experienced English Housewife, by Elizabeth Raffald, 1786, p. 271.

Curious, I focused my research to Queen Cakes. The recipes I found vary little as it is basically a pound cake. The few variations have to do with flavoring and the types of bakeware used. Below are a few examples I found interesting:

1739-
The House-Keeper's Pocket-Book, bake in patty-pans, glaze after baking.
1786-
The Experienced English Housewife, recipe above
1820-
The Practice of Cookery, Pastry and Confectionary, bake in small, ribbed petty-pans
1840-
A New System of Domestic Cookery, bake in little tins, tea-cups, or saucer
1864-
Modern Cookery for Private Families, heart-shaped tins are the usual by now

After spending several hours pouring through these and other antique books, my husband reminded me that
Alton Brown covered the history of cupcakes in his Good Eats episode "Honey I Shrunk The Cake" which if I had thought of sooner, would have saved me a lot of time. Although Brown says the modern cupcake is an American invention, cupcake roots go back to the 18th Century Queen Cakes. {Go here to read the transcript, Scenes 2, 3 & 6}


So, I think it's safe to assume that if Mr. Darcy were going to eat a cupcake, this is what it would look like:


Cupcakes for Mr. Darcy
(Makes 24 cupcakes)

Ingredients:

4 sticks unsalted butter
16 ounces all-purpose flour
2 cups sugar
8 eggs (appx. 16 ounces)
8 ounces
currants (if you cannot find them, you may use raisins)
pinch of salt
Flavoring/Spices:
1/2 tablespoon rosewater
or
1 tsp. mace
1 tsp. nutmeg
1/2 tsp. cinnamon


Directions:

Preheat oven to 325 degrees.
Place liners in muffin pan or grease with butter and flour ramekins or teacups.
With your stand mixer on medium speed, cream together the butter and sugar for 5 minutes. Turn the mixer to low and add the eggs one at a time, waiting for each to be fully incorporated. Add the salt and flavoring or spices and continue beating until fully incorporated. With mixer on lowest speed, add the flour in three installments, making sure each portion is fully incorporated before adding the next. When the batter is smooth, fold in the currants.

Scoop the batter into the cups, filling quite high. Bake for 20 minutes (longer if using ramekin or cup) or until golden on top. Let cupcakes cool. Top with sifted powdered sugar or make a thin glaze by mixing a half cup of sifted powdered sugar with enough hot water to make a slightly cloudy mixture. Dip the cupcake in the liquid and let the excess drain off, then set aside to dry.

Click here for the Printable Recipe at Tasty Kitchen.


Since they say the way to a man's heart is through his stomach, perhaps you'd like to invited someone special to tea...

"Do have another cupcake, Mr. Darcy."


Or perhaps you prefer Colonel Brandon?

*Sigh*


*Special thanks to Janet Clarkson, The Old Foodie, for helping me out in the cookbook department.


Iron Cupcake: Earth Voting and Prizes

Voting will begin no later than Sunday, February 28th at 8 p.m. at NO ONE PUTS CUPCAKE IN A CORNER, http://www.ironcupcakemilwaukee.com and will be open through Thursday, March 4th at 12 noon. Winner will be posted the night of March 4th, before 11:59 p.m.

Our Generous IronCupcake:Earth Prize Providers:

•The Demy™ by Key Ingredient
•Hello, Cupcake by Karen Tack & Alan Richardson
•Bella Cupcake Couture
•Cupcake Stackers by Gourmac
•The Cake Mix Doctor Returns! by Anne Byrne
•Beautiful Baking Liners by Vestli House
•Sweet Cuppin' Cakes Bakery & Cupcakey Supply

Tuesday, February 16, 2010

Apple Dipple Cake


Nana makes this cake often as it is one of her favorite recipes. She made it this Christmas and took it to the family Christmas party. The recipe was given to her in the early 1960's by her good friend Dot Powell. I haven't made this yet, but it is so good I have to go ahead and share it with you.

Apple Dipple Cake

Ingredients
3 eggs
1 1/2 cup Wesson oil
2 cup sugar
3 cup sifted all-purpose flour
1 tsp. baking soda
1 tsp. vanilla
1/4 tsp. salt
2 large apples (chopped)
1 cup Angel-Flake coconut
1 cup chopped pecans


Beat eggs, oil and sugar together. Blend in flour, soda, vanilla and salt. This makes a stiff batter, so beat well. Fold in chopped apples, coconut and chopped pecans. Bake in bundt pan or 2 loaf pans in 350 degree oven for one hour.

Topping
1 stick margarine
1 cup brown sugar
3/4 cup milk


Cook all together for 3 minutes after mixture comes to a boil. Pour over cake while cake and topping is still hot. Leave cake in pan in refrigerator overnight so topping can soak into cake.

Wednesday, September 23, 2009

I Can Can, Can You?


I happened upon a book called Food and Cooking in Victorian England by Andrea Broomfield. One of the first things I learned from this book was how the Industrial Revolution shaped Victorian England. Before the Industrial Revolution, most people worked from their homes to make goods to sell. They had their own gardens and raised animals to provide food for their families. When factories started supplying these same goods, the people had no choice but to move to cities and work in the factories. The populations of these cities boomed. Because homes were small and time and space was limited, this meant that people could no longer have gardens and keep animals for food. The food they ate had to be bought from others, instead of making it themselves. It only took a couple generations before people no longer knew how to do things like make cheese and butter.

That got me thinking. What kinds of skills am I lacking that to my grandparents and great-grandparents were parts of daily life? One thing that I knew for sure I had to learn was how to make and preserve my Nana’s Apple Butter. I’ve been eating this stuff all my life, and I’ve never met a better apple butter.

First Comes the Applesauce
We started with just over a half-bushel of apples. Some were Jonathan apples and the others we think are Granny Smith. Nana went to the Farmer’s Market and asked what would be a good cooking apple for apple butter. You want something that will make a tart applesauce.

Wash the apples, core and slice them with the peel on.
Place the slices in a large metal bowl with about a cup of water. Heat on medium-high, stirring often so the apples don’t stick. Cook the apples until completely soft, time depends on quantity.

To make the applesauce, we used a China cap and wooden pestle, but a food mill or potato ricer may work too. The goal is to push the apples through the small holes of the strainer, and discard the peel. This step is the most time consuming part of the whole process.

Now you have applesauce!! Measure the applesauce so you know how to adjust the recipe.

Giving the apples a bath

Nana stirring the apples so they don't stick.


Cook them until they turn into a mushy apple slop.


Nana's China Hat and Wooden Pestle


Let me show you how this works...

Nana is doing her applesauce workout, it really works the arms!!


Our lovely applesauce. We had 7 quarts!
 

Apple Butter

2 quarts applesauce (you could use store-bought applesauce, see note below)
4 cups sugar
2 teaspoons ground cinnamon
¼ teaspoon ground cloves
¼ teaspoon allspice

Add sugar and spices to applesauce and mix well.
*(If using store-bought applesauce, taste as you mix in sugar so you don’t add too much, if it is too sweet, you can add 1 tbsp of lemon juice.)
Cook on medium-low heat until the flavors are well blended.To prevent sticking, stir frequently as mixture thickens. (If too thick, add a small amount of water for desired consistency.)


Sugar? Check! Spices? Check! Yummy? Check!

While heating the apple butter, you can sterilize your jars, rings and caps. In a large pot, place your jars upside down. Add water until it comes about an inch up the jars. Add the rings and caps to the pot. Let sterilize for about 10 minutes. Keep them hot until ready to use. To retrieve them from the boiling water, you can use a canning jar lifter, (or a hand towel if you are brave like us) and kitchen tongs.

Most people seem to be intimidated by this part, but it's not so bad.


I love watching the water rise into the jars while sterilizing.

Pour the hot apple butter into hot jars, leaving ¼ inch headspace, (space between the apple butter and lip of the jar.) Use a canning funnel to keep things clean, and if any apple butter gets on the rim of the jar, wipe it clean or it will not seal properly. Place the cap on the jar, screw down tightly and set aside. The caps will pop after a few minutes which proves it has sealed correctly.

Now you have lovely and delicious apple butter!


Click here for the Printable Recipes for Homemade Applesauce and Apple Butter at Tasty Kitchen.


We're using my great-grandmother's canning funnel.
Nana gave it to me when we were done!


We used a hand towel to help protect our hands from the hot jars and lids.


Don't these look great? Wouldn't you like to have one?


How about this little guy?


Post a comment telling your favorite thing about fall, and you'll be placed in a drawing for this little jar of apple butter. Make sure to leave your email or website in the comment so I know how to contact you. I will only be able to ship this inside the U.S., (sorry friends elsewhere). I'll do the drawing on October 1st using a random number generator.
Congratulations Jenny! Your number was drawn with the Random Number Generator at RANDOM.ORG.
True Random Number Generator Min: 1 Max: 9 Result: 5 Powered by RANDOM.ORG


Nana's Apple Butter on Foodista

Monday, August 31, 2009

Say Cheese!

Ever wonder where your favorite food got it’s start? How about macaroni and cheese? Many believe that Thomas Jefferson invented macaroni and cheese; however, he perhaps only introduced the dish to America. Although it is true that Jefferson served Macaroni Pie at Monticello, macaroni and cheese was already a popular dish in Europe where Jefferson first tasted it.

The first known written recipe for Mac & Cheese comes from Elizabeth Raffald’s The Experienced English Housekeeper in 1769, (p.261). It's worth taking a look at if only to show your kids how people wrote weird back then, (Macaroni with Permafent Cheefe!). Actually, it's kind of neat to think that people back in the olden days liked the same foods we do today. Just think of Jane Austen with a big plate of Mac & Cheese. Maybe she thought about writing, "It is a truth universally acknowledged, that a single man in possession of macaroni, must be in want of cheese."

 
Today's recipe is an antique recipe from Mrs. Isabella Beeton. She wrote Mrs Beeton's Book of Household Management which was Victorian England's Bible for all thing domestic. And just so you can appreciate what it took to make Macaroni back in the day, Mrs. Beeton states the time to boil the macaroni can be up to 1 3/4 hours. Talk about slaving over a stove all day...

Mrs. Beeton’s Macaroni, as usually served with the Cheese Course
Adapted for the modern kitchen
Serves 6-7 (In Victorian terms that is, this is part of a larger meal)

Ingredients:
½ lb. Pipe macaroni
¼ lb butter
6 oz. Grated Parmesan or Cheshire cheese
pepper and salt to taste
1 pint milk (optional, see note below)
2 pints water
fine bread-crumbs (I think I’ll use Ritz cracker crumbs, yum!)


Put the milk and water in a saucepan with sufficient salt to flavor it. Bring water to a boil and cook macaroni as directed on package. Drain macaroni and put it into a deep dish. Sprinkle some of the cheese and butter cut into small pieces throughout the macaroni. Spread the remainder of the cheese over the top. Season with a little pepper and cover with bread-crumbs. Warm, without oiling, the remainder of the butter and gently pour over the bread-crumbs. Place it under the broiler to brown the crumbs.

(Mrs. Beeton says that the macaroni can be boiled in plain water instead of using milk, but should then be mixed with some butter.)
Click here for the Printable Recipe at Tasty Kitchen.

Cheshire Cheese (bought mine at The Fresh Market)


Even though Ritz crackers are not the breadcrumbs Mrs. Beeton would have used, I have to say they balanced with the tangy Cheshire perfectly.


Helpful links:
http://www.museumofhoaxes.com/hoax/weblog/comments/4598/

http://www.loc.gov/exhibits/treasures/tri019.html

http://wiki.monticello.org/mediawiki/index.php/Macaroni