Sunday, December 20, 2009

Christmas Brunch

It's Christmas morning. The tiny tots wake up before dawn excited and you all meet around the tree to see what Santa brought. Then it's time to open the gifts to each other. You've spent time carefully considering what to buy your loved ones. You've wrapped packages, decorated them with gift tags and bows, and now it's time to tear in. Wait, no, not so fast! Let's savor this time. Let's see the joy and excitement on each face. Yeah, that's better.

OK, so not every family is like mine. We patiently take turns opening presents, one at a time please, we can't be greedy. We see what each person receives and we know from whom it was given. There's eight of us, so uh, yeah, it's gonna take a while. After all the presents are opened and the excitement has died down, our stomachs start rumbling. It's time for brunch.


Christmas morning is not the time to be in the kitchen when you can be enjoying your family and maybe some new gadgets. Here's a recipe given to me by my friend Wanda. It's the most requested item this Holiday season, and it's so easy to make. What's better is that you could make these the night before Christmas and serve them without doing anything more than warming them in the oven for a few minutes.


Bacon and Cheese Puffs
Makes 24 puffs


Ingredients:
1 block of cream cheese, softened

2 tablespoons milk
1 cup Parmesan cheese (shredded),
2-3 ounces bacon bits (You can use more if you must)
1 can of flaky biscuits (8 count)


Preheat your oven to 350 degrees.
In a mixing bowl, combine the cream cheese, milk, Parmesan cheese, and bacon bits until well blended. Divide each biscuit into thirds by separating the layers evenly. Place each biscuit third into mini muffin cups and press into the cup to make a shell. Fill each shell with about a teaspoon of the mixture. Bake in the oven for 20 minutes or until golden brown. Serve warm or room temperature.

Click here for the printable recipe at Tasty Kitchen.

Wednesday, December 9, 2009

Hot Potatoes!


When I want a special side dish for a special occasion, it must be roasted potatoes. They are so yummy and easy to make, there is no reason to pass on making these babies!

I've had potatoes mashed, baked, boiled, fried, scalloped, au gratin and hashed. I've had tater tots, French fries, potato dumplings, potato soup, potato bread, potato chips, and probably other preparations of potatoes that I can't think of right now. Yet there is something special about roasted potatoes.

I learned to make roasted potatoes while staying with some friends in England. Roast Potatoes are a staple in British cuisine. You'll find them most often in the
Sunday Lunch and as a part of the Christmas spread as well. I guarantee they will be on my table this Christmas!

Roasted Potatoes

6 large potatoes, peeled and quartered
1/4 cup of vegetable oil
Kosher salt, to taste

Preheat oven to 500 degrees. Place potatoes in a large pot and cover with cold water, adding a little salt to season the water. Bring the water to a boil and boil potatoes for 5 minutes. Drain the water and return the potatoes to the pot. Cover the pot with its lid and holding the lid in place shake the pot to "rough up" the potatoes.

Place the potatoes in a roasting pan and drizzle with the oil and toss the potatoes to coat well. Sprinkle with salt to taste. Place pan in the oven and roast for about 50 minutes. Turn potatoes at least once halfway through cooking to allow for even browning. Once the potatoes have browned as you like them, remove from oven and place on a paper towel to drain the excess oil. Serve warm, but be careful that you don't eat them strait from the oven or you may burn your mouth!

Once you have learned to make roast potatoes, you can modify the recipe to create different versions. For example, changing the oil to a goose fat or the drippings from a roast will change the flavor. Try adding different herbs or spices. Roast the potatoes in olive oil and add fresh rosemary. I like using vegetable oil, salt and pepper and adding carrots that have been cut into large chunks. The possibilities are endless!

Click here for the Printable Recipe at Tasty Kitchen.

Monday, December 7, 2009

Sinister Santas

If you haven't been following Cake Wrecks, WHERE HAVE YOU BEEN? Cake Wrecks is only the funniest blog on the planet, with pictures of insane cakes to laugh at each day, (well, actually Sundays are for nice cakes so we know how bad the others are.)

If you haven't seen
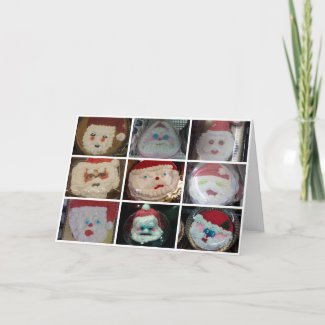
today's post, then hop on over and check it out, and then I'm sure you'll want this card for all your friends!

Santa is Watching card
Santa is Watching by cakewrecks
Shop for a greeting card at zazzle


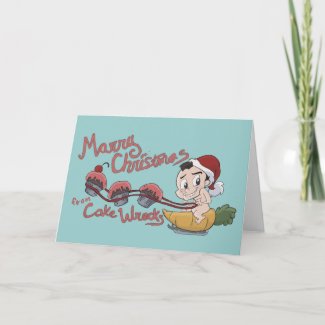
And of course, if you've been a fan of Cake Wrecks for any length of time, this little guy is near and dear to your heart...


See more Wreckwear at the cakewrecks Zazzle Store!

Oh, and you HAVE to get the Cake Wrecks book! It's like the blog, but in book form, with more stories and new cakes! I was trying to look at it over Thanksgiving, and it took me about two days because everyone kept taking it from me to look at it themselves. {You can find links to the book on the Cake Wrecks blog.}

Thursday, December 3, 2009

Drenched in Custard

It's December and the most glorious time to be in the kitchen if you ask me. There are so many delicious treats to be made and meals to be prepared! When it comes to Christmas and food, I like to try new things, but I also like to prepare traditional dishes as well.

As I was thinking about what I wanted to prepare this year, I remembered a Christmas a while back when we visited some friends and had boiled custard. It was delicious! I don't know the exact history of boiled custard, although this type of custard seems to be traditional in the Southern United States. Custard in general has a long history of creating and complimenting dishes both sweet and savory.

My friend Pam has generously shared her recipe with me and now I'm passing it on to you! Enjoy this custard hot or cold, in a glass, or drenching your dessert!

Pam's Boiled Custard

Ingredients:
2 cups sugar
1 cup plain flour
1 gallon whole milk
6 eggs, separated
Vanilla to taste
(about 2 large "cook spoons")

Put milk in a double boiler (or if you don't have one, set your pan in a skillet of water). Mix together sugar and flour and slowly stir into milk. Add egg yolks (be sure you do this before the milk gets too hot so your eggs don't cook too fast). Stir until milk comes to a boil. Continue stirring until the mixture thickens. Remove from heat. Add vanilla." Allow to cool slightly. Beat egg whites and fold in. Serve in a pitcher.


Pam's Boiled Custard on Foodista

Monday, November 30, 2009

Cyber Monday


It's Beginning to Look a Lot Like Christmas!!

It's Cyber Monday which means it's time to do all your internet shopping. Here's a look at some delicious designs by Tricia-Rennea to get you in the holiday mood!


Best Friends and Cupcakes and Christmas! print
Best Friends and Cupcakes and Christmas! by trennea
See all the posters on zazzle


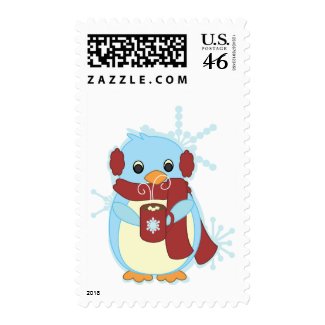
Penguin with Hot Cocoa stamp
Penguin with Hot Cocoa by candystore
View more stamps available on zazzle.com


Check out more great Christmas designs at Tricia-Rennea's Zazzle Stores:
tricia-rennea art
The Candy Store!

Visit Tricia-Rennea's blog for free printables and an overdose of cute! For custom illustrations go to Trillustrations.com.


Monday, November 23, 2009

Iron Cupcake: Earth--Apple


It's the last Iron Cupcake Challenge of the year. This month's ingredient is Apple, and there are lots of delicious ways to incorporate apples into a cupcake. I chose to combine caramel with apple to make a moist and sweet cupcake. Caramel buttercream tops this cuppy with the perfect amount of sweetness.


Other than the basic pantry items, this is all you need to buy from the grocery store. I'm not at all ashamed to use a box mix. According to Alton Brown, it is better to use a box mix and make your own icing. Besides, we are making it our own.

Caramel Apple Cupcakes
with Caramel Apple Buttercream*

Cake Ingredients:
1 box Yellow Cake Mix + necessary ingredients
2 Granny Smith Apples: peeled, cored and sliced
8-12 ounces Caramel

Icing Ingredients:
1 cup sugar
1/4 cup apple juice
1/4 cup heavy cream
3 sticks unsalted butter, softened
4 large egg whites
1 teaspoon vanilla extract


Follow the directions on the box to blend the ingredients for the cake batter and set aside. Using the shredding blade on a food processor, shred the apples and add to the batter. In a heatproof bowl, melt the caramel in the microwave for about 20 seconds increments, stirring after each until completely melted. Using a stand mixer, drizzle in the caramel in thin ribbons. If the caramel begins to cool, warm it a little and begin again. Avoid large clumps of caramel from entering the batter as it will clog the beaters. Pour batter into cupcake liners, filling almost to the top. Bake 20 minutes or until golden. Let cool before icing.

Bring 1/2 cup of sugar and apple juice to a boil in a saucepan. Wash sides of pan with a wet pastry brush to prevent sugar crystals from forming. Cook, undisturbed, until caramel is dark amber. Remove from heat, and slowly add cream, stirring with a wooden spoon until smooth. Let cool.

Place whites and remaining 1/2 cup of sugar in a heatproof mixer bowl and set over a pot of simmering water. Whisk until sugar dissolves and mixture registers 160 degrees on a candy thermometer. Remove from heat and attach bowl to a mixer. Whisk on medium speed for 5 minutes. Increase speed to medium-high, and whisk until stiff, glossy peaks form, about 6 minutes. Reduce speed to medium, and add butter a tablespoon at a time, whisking well after each addition. Whisk in vanilla. Reduce speed to low and add caramel and beat until smooth, 3 to 5 minutes. Use immediately, or cover, and refrigerate for up to 3 days. (Bring to room temperature, and beat on low speed until smooth before using.)

Click here for the Printable Recipe at Tasty Kitchen.


*Icing recipe adapted from Caramel Buttercream in Martha Stewart Living February 2009.


Iron Cupcake: Earth Voting and Prizes

Voting will begin no later than Friday, November 27th at 8 p.m. at NO ONE PUTS CUPCAKE IN A CORNER, http://www.ironcupcakemilwaukee.com and will be open through Thursday, December 3 at 12 noon. Winner will be posted the night of December 3rd, before 11:59 p.m.

Our Generous IronCupcake:Earth Prize Providers:

•The Demy™ by Key Ingredient
•Hello, Cupcake by Karen Tack & Alan Richardson
•Bella Cupcake Couture
•Cupcake Stackers by Gourmac
•The Cake Mix Doctor Returns! by Anne Byrne
•Beautiful Baking Liners by Vestli House
•Sweet Cuppin' Cakes Bakery & Cupcakey Supply

Friday, November 20, 2009

Pumpkin Hearts Chocolate


I can't help myself!! I can't stop making this Chocolate Chip Pumpkin Bread. It is amazing! I could remind you how much I love Pumpkin and Chocolate together, or you could just go here. Make this a few days ahead of Thanksgiving and wrap in cling wrap until ready to eat. I think it is best served a little warm so the chocolate is a little soft. Mmmmm, I'm salivating just thinking about it.

Just look at it! It's calling out to you!

Chocolate Chip Pumpkin Bread

Original Recipe Found

Here
at Make It Do
 
Ingredients:
3-1/2 cups All-Purpose Flour
2 teaspoons Cinnamon
2 teaspoons Baking Soda
1 teaspoon Baking Powder
1-1/2 teaspoon Salt
2-2/3 cups Sugar
2/3 cup Softened Butter
4 Eggs
1 pound Mashed Pumpkin
2/3 cups Water
1 Cup Semi-Sweet Chocolate Chips (I actually used a whole 11.5 ounce bag of chips)

Directions:
Preheat oven to 325 degrees.
Sift together dry ingredients and set aside. Cream sugar and butter until well incorporated. Add eggs one at a time and then add the mashed pumpkin. Alternate adding dry ingredients with water. Fold in chocolate chips.
Pour into two large greased bread pans and bake at 325 degrees for 55 to 60 minutes or until a cake tester comes out clean.

Friday, October 30, 2009

Turkey Day Is On It's Way!

I recently stumbled upon a blog that I immediately began to love. Tricia-Rennea of Trillustrations.com is my new favorite illustrator! On her blog she generously posts free clipart and printables that you can use for invitations, decorations, craft projects and more! Go check out her websites as well as her Zazzle stores where you can purchase products with her illustrations. I know you will enjoy her work as much as I do.

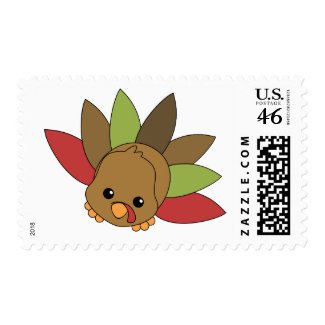
Since Turkey Day is just around the corner, I thought I'd share with you some of her Thanksgiving products at Zazzle. First up is this little cutie on a postage stamp. I think he is saying, "Please don't eat me, I'm too cute to be cooked!"


Next is this lovely pumpkin shirt. I just love the swirls!


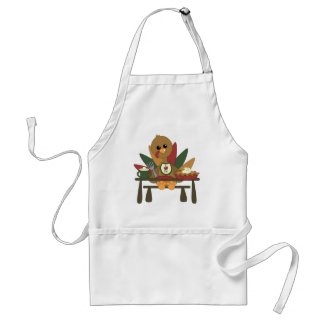
Of course, if you're in the kitchen on Thanksgiving, you don't want to ruin your new duds, so why not an apron with Tommy Turkey?

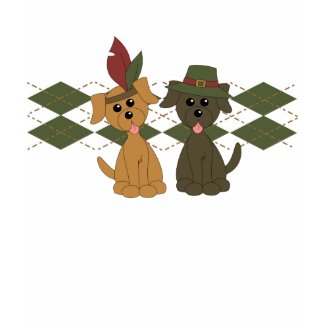
And we can't forget the history of Thanksgiving. Were the pilgrims dogs?


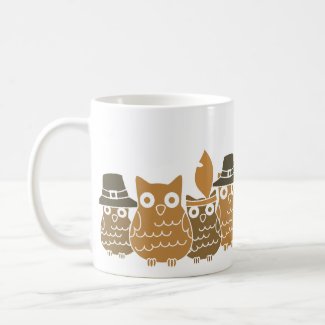
Or owls?


Maybe they were squirrels.


Here are the links to her Zazzle stores where you can find even more of Tricia-Rennea's beautiful designs!
The Candy Store!
tricia-rennea art

Tuesday, October 27, 2009

Taco Soup

It's cold and rainy today. On a day like this I'd like to stay under my blanket instead of hanging out in the kitchen. That means it's time to pull out the crock pot and make Taco Soup. I've tried different versions of this soup, but I find this recipe that my friend Martha gave me to be the best.


Taco Soup

1 lb ground beef, browned and drained
2 cans Shoepeg corn
1 can Black beans
2 cans Kidney beans
2 cans Crushed tomatoes
1 package taco seasoning
1 package ranch dressing mix


Put all ingredients into a large pot, (do not drain cans.) Cook on high for 30 minutes, stirring often. Simmer until ready to serve.

OR...

Put all ingredients into crock pot, (do not drain cans.) Cook on low all day or on high for 5 hours. Stir often.

I think shredded cheddar cheese and corn chips are the best way to adorn this soup, but feel free to try crackers or cornbread too.

Foodbuzz Blog Awards
Take part in the foodbuzz blog awards by voting today!! Just click the link below to see the nominees. Some of my favorites are Bakerella, Cake Wrecks, and Iron Cupcake: Earth. Bakerella always has sweet ideas with great photos. Cake Wrecks gives readers a daily dose of wit and humor, not to mention hilarious cakes. And if you've been reading this blog you'll already be familiar with Iron Cupcake: Earth. Since it is a community effort, a win for Iron Cupcake: Earth is a win for all of us cupcake challengers too!
http://www.foodbuzz.com/blogs/1474529-announcing-the-foodbuzz-blog-awards-
Hurry! Voting ends October 29th!

Friday, October 23, 2009

Iron Cupcake: Earth-- Music part two


Autumn is my favorite season. I love the brisk air, colorful leaves, and pumpkins! A few days ago we went to a produce stand and Sophie found a tiny pumpkin and carried it around the whole time we were there. She was so proud of it and called it a peekee. Of course she got to take it home with her.

I couldn't resist making pumpkin cupcakes. Pumpkins really are a treat this time of year, especially when paired with chocolate, (what isn't better with chocolate?) This cupcake is for the kiddies. The recipe is easy enough to have little helpers in the kitchen. Oh, and did I mention the chocolate? Since this is for Iron Cupcake: Earth Music, check out the Pumpkin Song...
 
Pumpkin Song
(Tune: Twinkle Twinkle Little Star)
Pumpkin Pumpkin on the ground
How'd you get so big and round?
Planted as a seed so small
Now you are a great big ball
Pumpkin Pumpkin on the ground
How'd you get so big and round?


Pumpkin Chocolate Chip Cupcakes
makes approximately 32 cupcakes

1 chocolate cake mix
4 eggs
1 cup melted butter, divided
15 oz can pumpkin
8 oz cream cheese softened
1 tsp vanilla extract
16 oz confectioners sugar
8 oz chocolate chips
whipped cream for garnish (optional)
chocolate shavings for garnish (optional)

Preheat oven to 350. Combine cake mix, 1 egg and 1/2 cup melted butter in bowl and mix well. Divide batter into cupcake liners (about 1 tsp in each liner) and pat down into the bottom.

Using a mixer, beat cream cheese until smooth, then add the pumpkin, 3 eggs, vanilla, sugar and mix well. Reduce mixer speed and slowly add butter. Mix well then fold in chocolate chips. Spoon mixture into liners (about 1 tbsp in each liner). Bake for 20-25 minutes. The cupcakes won't be completely set when done. Cool completely before serving. Garnish with whipped cream and chocolate shavings.

*Note: I used silicone cupcake liners. Results may differ with traditional liners. However, lightly greased foil liners may produce similar results to the silicone liners.

Click here for the Printable Recipe at Tasty Kitchen.

{Adapted from Paula Deen's Ooey Gooey Pumpkin Cake}

Iron Cupcake: Earth Voting and Prizes

Voting will begin no later than Friday, October 30th at 8 p.m. at NO ONE PUTS CUPCAKE IN A CORNER, http://mkecupcakequeen.blogspot.com/ and will be open through Thursday, November 5 at 12 noon.

Our Generous IronCupcake:Earth Prize Providers:
The Demy™ by Key Ingredient
Hello, Cupcake by Karen Tack & Alan Richardson
Bella Cupcake Couture
Cupcake Stackers by Gourmac
The Cake Mix Doctor Returns! by Anne Byrne</S?<>

Wednesday, October 21, 2009

Smooth!


Sometimes I'm out somewhere and confronted with a smoothie. I think, "Ooh, healthy!" so I get one. There are some great places to get a smoothie, like Smoothie King, but then there are places where all they've done is taken some orange sherbet and mixed it with a meager amount of fruit. Not only is the flavor off, but it doesn't seem like such a healthful choice after all. I expect more from my smoothie.

After having some disappointing smoothies, I decided to to try making them at home. I tried different recipes and then started playing around with my own concoctions. Below is my standard smoothie recipe. The fruit I use can be adjusted to my mood, but the technique remains the same. Give it a try and experiment with the fruits you love.

Fruity Smoothie

1/2 cup non-fat yogurt
approximately 1/3 cup orange juice
frozen or fresh fruit of your choice: strawberries, peaches, blueberries, etc.
1 banana, sliced
1 tbsp crushed pineapple + juice, optional (more if you like)
1-2 tbsp. sugar or honey to taste
ice cubes, optional

Using a pint glass, (or whatever drinking vessel you will be using) spoon in yogurt. Fill with frozen/fresh fruit. Pour in orange juice to top of glass. Pour into blender and add remaining ingredients. Blend all ingredients together until fruit and ice is small enough to fit through a straw. Pour smoothie back into your pint glass and add a straw and you're done...


...Or are you? I bet you have some smoothie leftover in your blender. Pour the leftovers into an ice cube tray. Freeze and you have Smoothie Cubes. Take the cubes out of the tray and put into a freezer bag and stash back in the freezer. Next time you want a smoothie, just take the smoothie cubes out of the bag and blitz in your blender again. Ta dah! Smoothie!


Delicious Little Jewels

Are you preggers? Have morning sickness or are hungry all the time? Here is another thing you can do with Smoothie Cubes: fill a good sized plastic cup with Smoothie Cubes. Then fill about half way with orange juice or whatever juice sounds good to you. Let sit a while, the orange juice freezes up a bit. Then insert your straw and sip away. Because the smoothie is mostly frozen it will take a while to soften up. This means you're sipping a little at a time, and it can take a couple of hours before you will have sipped up the whole thing. This got me through my morning sickness. Don't forget about all the calcium and vitamins you get in a smoothie!

Monday, October 12, 2009

Iron Cupcake: Earth-- Music


Iron Cupcake: Earth is back! This month's theme is Music and we are challenged to create a cupcake based on a song title. I knew almost immediately which song I wanted to do. This song is one of Sophie's favorites. Now since she's 18 months old, you might think I've chosen The Itsy Bitsy Spider or Jesus Loves Me. While she does love those songs, there is no other song that affects her like this one. If she's riding with Grandmomma and Aunt Geggie (that's what Sophie calls her), and she starts crying, just a few bars of this song will dry those tears. So, I chose the song Popular from the musical Wicked.
 

If you're not familiar with this musical, it tells the story of what happened in Oz before Dorothy came along. The two main characters are Elphaba (you know her as the Wicked Witch of the West) and Glinda. They become roommates at University, and notice right away how different they are. Glinda is blond and girly; Elphaba is green. In the song Popular, Glinda describes to Elphaba all the ways she is going to teach her to be popular. These cupcakes pair well together not only in color but in taste as well. The Glinda cupcakes are light and fruity. The Elphaba cupcakes are chocolaty, but not too dark, because after all, Elphaba wasn't all that wicked.


Elphaba and Glinda "Popular" Pound Cake Cupcakes

“Popular” Pound Cake Cupcakes

Glinda Cupcakes (makes 24)

1 stick unsalted butter, soft but still cool (1/4 lb.)
1 ½ cups sugar
½ cup sour cream
1 ½ cups cake flour
¼ tsp baking soda
3 eggs, room temperature
½ tsp. Vanilla extract


Elphaba Cupcakes (makes 24)

1 stick unsalted butter, soft but still cool (1/4 lb.)
1 ½ cups sugar
½ cup sour cream
1 ½ cups cake flour
¼ tsp baking soda
3 eggs, room temperature
3 tbsp. Cocoa Powder
Pinch of salt
1 tsp vanilla extract


Use the following instructions for both the Glinda and Elphaba cupcakes.

Preheat oven to 325 degrees. Using a chilled metal bowl and beaters, cream the butter and sugar together for 5-6 minutes. Sift together the dry ingredients into a bowl and set aside. Add eggs to mixture one at a time, beating after each to fully incorporate. Add dry ingredients about a half cup at a time alternately with the sour cream and vanilla, without over-beating. Fill cupcake liners halfway and bake for 25-30 minutes.

Using cardstock, print and cut out
cupcake wrappers. Adhere the wrapper ends together with glue dots and place cupcake in wrapper.

“Wicked” Good Swiss Meringue Buttercream
makes enough icing for 48 cupcakes, or less if you really pile it on.

1 ¼ cup sugar
5 egg whites
4 sticks of room temperature butter cut into pieces
1 tsp vanilla
Pink and Green food coloring, (suggested: Wilton’s Icing Coloring-Pink and Leaf Green)
½ cup Strawberry Preserves


Place sugar and egg whites in a double boiler over simmering water, and whisk about three minutes, until mixture is smooth.

Pour into bowl of a stand mixer and whisk on high until cool and forms stiff peaks, about 1o minutes.

Add butter one piece at a time mixing well after each piece. Buttercream may appear to be curdled, at this point, but continue beating until smooth again. Add vanilla and beat until fully incorporated. Beat on low to get rid of air pockets.

Divide Buttercream into two bowls.

For Elphaba Icing, mix in green food coloring until the desired color is achieved.

For Glinda Icing, warm preserves in microwave for 30 seconds. Puree in a food processor or blender until smooth. Strain through a sieve into a bowl and set aside until cool, (you can skip this step if you will use a large tip that won't clog). Then fold into Buttercream until desired color and flavor is achieved. Add some pink food coloring to achieve a deeper pink color.

Cool cupcakes completely before icing. Using a large star tip, pipe icing into big swirls onto each cupcake.

Elphaba Cupcakes: Choclate Pound Cake with Vanilla Swiss Meringue Buttercream Icing

Glinda Cupcakes: Vanilla Pound Cake with Strawberry Swiss Meringue Buttercream


Iron Cupcake: Earth Voting and Prizes

How popular will these cupcakes be?

Voting will begin no later than Friday, October 30th at 8 p.m. at NO ONE PUTS CUPCAKE IN A CORNER, http://mkecupcakequeen.blogspot.com/ and will be open through Thursday, November 5 at 12 noon.

Our Generous IronCupcake:Earth Prize Providers:
The Demy™ by Key Ingredient
Hello, Cupcake by Karen Tack & Alan Richardson
Bella Cupcake Couture
Cupcake Stackers by Gourmac
The Cake Mix Doctor Returns! by Anne Byrne

Friday, October 2, 2009

Not Just Plain Vanilla

 
One stop on our Honeymoon cruise was Cozumel. The best store in Cozumel is Los Cinco Soles. It has lots of great souvenirs, and not things like cheesy key chains, but beautiful Mexican art and handmade products. But the best thing you can bring home from Los Cinco Soles is their Natural Gourmet Vanilla.
 
This vanilla really is wonderful. We bought ours four years ago and we're still using it, but it is almost gone. Thankfully, Los Cinco Soles is now able to ship to the U.S.!


See, not much left, and I've used more since taking this picture!


Los Cinco Soles Natural Gourmet Vanilla
For those who know the difference...

To order, visit Los Cinco Soles at www.loscincosoles.com/vanilla.htm. Choose between 16.9 oz. or 1 liter bottles. Paying with Paypal makes ordering a cinch! I recommend this vanilla, there's nothing like it! It is definitely worth the price even with shipping, because did you see? You can get 1/2 liters and whole liters!! Just think about how much you spend on that tiny little bottle you buy at the grocery store. Los Cinco Soles also gives you different options for ordering multiple bottles, so buying extra bottles for gifts is easy. A giant bottle of fabulous Mexican vanilla would be a gift to make any food lover swoon!

Wednesday, September 30, 2009

Reinventing the Wheel


If you love food, then you need to go check out Get Cookin' at pauladeen.com. Each week has a different food topic. Paula posts recipes and videos for that topic and gives us a weekly activity. This week was Kid's Lunch Box. Our activity was to submit photos or videos of something creative for a lunchbox. I submitted the Elizabeth Sandwich. Below is my entry, but you can go here to see it on Get Cookin'. Paula gives us our topic each Thursday and you have until Tuesday to post your submission. On Wednesday Paula will choose winners! This week, two winners will receive Paula Deen's new book, Cookbook for the Lunch-box Set.

Let me introduce you to the Elizabeth Sandwich. This is the ultimate peanut butter and jelly sandwich. You've probably noticed how when you pack a pb&j, the jelly makes the bread soggy on it's half of the sandwich. Here's how to keep that from happening...

  • First you need three pieces of bread.
  • Lay out your bread keeping the piece that you will use for the middle separate from the other two.
  • Spread peanut butter onto one side of each of the two outside slices of bread. You probably don't want to slather each slice with as much peanut butter as you normally do for a regular sandwich.


For the middle slice of bread, cover both sides with jelly and place between the two other slices.


Now the peanut butter will keep the bread from turning soggy.


The best time to make this sandwich is the night before you'll eat it. By the time lunch rolls around, that middle slice of bread has soaked up all the jelly, and that is a good thing. It will keep jelly from dripping out of the sandwich and all over your hands. Keep in mind that this is one hefty sandwich. If you're making this for you child, you'll want to spread the jelly and peanut butter thinner than normal.

*Here's a tip for smoother jelly spreading. Spoon the amount of jelly you need into a small bowl and microwave for about 15 seconds. Then stir until smooth. This will make the jelly spread easier without big clumps.


The ultimate peanut butter and jelly sandwich.

Wednesday, September 23, 2009

I Can Can, Can You?


I happened upon a book called Food and Cooking in Victorian England by Andrea Broomfield. One of the first things I learned from this book was how the Industrial Revolution shaped Victorian England. Before the Industrial Revolution, most people worked from their homes to make goods to sell. They had their own gardens and raised animals to provide food for their families. When factories started supplying these same goods, the people had no choice but to move to cities and work in the factories. The populations of these cities boomed. Because homes were small and time and space was limited, this meant that people could no longer have gardens and keep animals for food. The food they ate had to be bought from others, instead of making it themselves. It only took a couple generations before people no longer knew how to do things like make cheese and butter.

That got me thinking. What kinds of skills am I lacking that to my grandparents and great-grandparents were parts of daily life? One thing that I knew for sure I had to learn was how to make and preserve my Nana’s Apple Butter. I’ve been eating this stuff all my life, and I’ve never met a better apple butter.

First Comes the Applesauce
We started with just over a half-bushel of apples. Some were Jonathan apples and the others we think are Granny Smith. Nana went to the Farmer’s Market and asked what would be a good cooking apple for apple butter. You want something that will make a tart applesauce.

Wash the apples, core and slice them with the peel on.
Place the slices in a large metal bowl with about a cup of water. Heat on medium-high, stirring often so the apples don’t stick. Cook the apples until completely soft, time depends on quantity.

To make the applesauce, we used a China cap and wooden pestle, but a food mill or potato ricer may work too. The goal is to push the apples through the small holes of the strainer, and discard the peel. This step is the most time consuming part of the whole process.

Now you have applesauce!! Measure the applesauce so you know how to adjust the recipe.

Giving the apples a bath

Nana stirring the apples so they don't stick.


Cook them until they turn into a mushy apple slop.


Nana's China Hat and Wooden Pestle


Let me show you how this works...

Nana is doing her applesauce workout, it really works the arms!!


Our lovely applesauce. We had 7 quarts!
 

Apple Butter

2 quarts applesauce (you could use store-bought applesauce, see note below)
4 cups sugar
2 teaspoons ground cinnamon
¼ teaspoon ground cloves
¼ teaspoon allspice

Add sugar and spices to applesauce and mix well.
*(If using store-bought applesauce, taste as you mix in sugar so you don’t add too much, if it is too sweet, you can add 1 tbsp of lemon juice.)
Cook on medium-low heat until the flavors are well blended.To prevent sticking, stir frequently as mixture thickens. (If too thick, add a small amount of water for desired consistency.)


Sugar? Check! Spices? Check! Yummy? Check!

While heating the apple butter, you can sterilize your jars, rings and caps. In a large pot, place your jars upside down. Add water until it comes about an inch up the jars. Add the rings and caps to the pot. Let sterilize for about 10 minutes. Keep them hot until ready to use. To retrieve them from the boiling water, you can use a canning jar lifter, (or a hand towel if you are brave like us) and kitchen tongs.

Most people seem to be intimidated by this part, but it's not so bad.


I love watching the water rise into the jars while sterilizing.

Pour the hot apple butter into hot jars, leaving ¼ inch headspace, (space between the apple butter and lip of the jar.) Use a canning funnel to keep things clean, and if any apple butter gets on the rim of the jar, wipe it clean or it will not seal properly. Place the cap on the jar, screw down tightly and set aside. The caps will pop after a few minutes which proves it has sealed correctly.

Now you have lovely and delicious apple butter!


Click here for the Printable Recipes for Homemade Applesauce and Apple Butter at Tasty Kitchen.


We're using my great-grandmother's canning funnel.
Nana gave it to me when we were done!


We used a hand towel to help protect our hands from the hot jars and lids.


Don't these look great? Wouldn't you like to have one?


How about this little guy?


Post a comment telling your favorite thing about fall, and you'll be placed in a drawing for this little jar of apple butter. Make sure to leave your email or website in the comment so I know how to contact you. I will only be able to ship this inside the U.S., (sorry friends elsewhere). I'll do the drawing on October 1st using a random number generator.
Congratulations Jenny! Your number was drawn with the Random Number Generator at RANDOM.ORG.
True Random Number Generator Min: 1 Max: 9 Result: 5 Powered by RANDOM.ORG


Nana's Apple Butter on Foodista